Tuesday, November 22, 2011

Turkey, turkey!


This one was a fun craft to do while I had the pleasure of babysitting my daughters best friend! You need...
(per turkey)
1 babyfood jar (any size)
2 googly eyes
1 small orange or yellow triangle for the beak
6 feathers from construction paper of assorted colors
1 rubber band
candy (candy corn, m&ms, it's your choice)
marker, glue, scissors

1) Cut out your beak and feathers.
2) Ask your child(ren) things they are thankful for (or if they can't quite grasp this, try asking what things they really like) and write their answers on the feathers
3) Have your child fill the jar with candy they like.
4) Put on the lid and glue. on the eyes and beak.
5) Glue the feathers together, then onto the jar. Put the rubber band around the feathers/jar so that they stay down while drying.
6) When dry, take off the rubber band and enjoy!

Homemade liquid soap and sugar scrubs!

Sorry I haven't been updating! I have been visiting family and -whew- I am worn out...
Soap turned out AWESOME. I used the bar soaps from Bath & Body Works, which aren't very moisturizing, and since my soap ended up being just a little less than 1 gallon, I filled it all the way up with moisturizing lotion (I used Coco Butter actually) and poured it all back into the pot, stirred, and back into the milk jug. Works great! And soooo much cheaper than buying it- which is good, because my daughter has a nice habit of using a lot of soap whenever she washes her hands. I know how to make regular baby soap in to foaming baby soap, so I am going to try it with the liquid hand soap and let you know how that works out. It should be the same!

Here's the recipes I used:

Brown Sugar Scrub
(this is very much a play-with-it recipe, meaning you chose just about everything for it, lol)
1 part brown sugar 1 part white sugar.
oil (olive oil, sunflower oil, grape seed oil, any oil you want)

Mix sugars. Pour into container that it will be stored in, and pour in some oil. When the oil has soaked through as far as it is going to, pour some more. Continue until it reaches the bottom. You will probably have to stir it to make sure that everything at the bottom is covered.
Ta-da! All done!

Lemon Sugar Scrub
This is also a play-with-it recipe! Lucky you!
Measure out how much white sugar you will need to fill the container (fill it pretty full, because it will sink down once soaked in oil). Pour that into a bowl and set aside. Juice a lemon (if you don't know how to do that, go here) and mix the juice (sans seeds) with the sugar. Put the sugar in the bowl, and follow the same process with the oil as with the brown sugar scrub. After a while, the scrub will settle and have about a half an inch of oil on top. If it does not, add more. You will need to stir this before using, and if you are giving as a gift, I suggest finding a cutesy soup spoon at Goodwill or Salvation Army to tie to the jar with a ribbon. It is also cute is you want to do some glass etching, which I will be doing to mine and posting pictures of later.

Liquid Hand Soap from a bar of soap
This one is not so play-with-it.
Use a cheese grater to grate one bar of soap. Or, if cheese graters hate you the way they do me, use a sharp knife to cut the bar into very small slivers. As small as you possibly can.
Bring 1 gallon of water almost to boil (if it does start boiling, it's ok)
Add the soap and 2 tablespoon of glycerin, and stir until the soap is melted (it should only be a minute or so, I was actually very surprised about how fast it was).
Turn off the burner and let the soap cool overnight (about 10-12 hours). Check it in the morning. Mine was fine, but if you think it is too thick, add a little bit of water and use a hand mixer to mix. I would just do a little at a time. Then, use a funnel to put it back into your gallon milk jug for storage! ta-da!

Monday, November 14, 2011

Lots of DIY gifts today

Today I DIY-ed some lemon sugar scrub, brown sugar scrub, cinnamon/nutmeg/honey/lemon face mask, and liquid hand soap.
I will let you know tomorrow how the soap turned out (have to let it sit overnight to cool and thicken) but the scrubs and face mask look great! I haven't had a chance to try any yet because the scrubs are Christmas gifts. I will post recipes tomorrow when I post about my soap!

Tuesday, November 8, 2011

S'mores cupcakes!


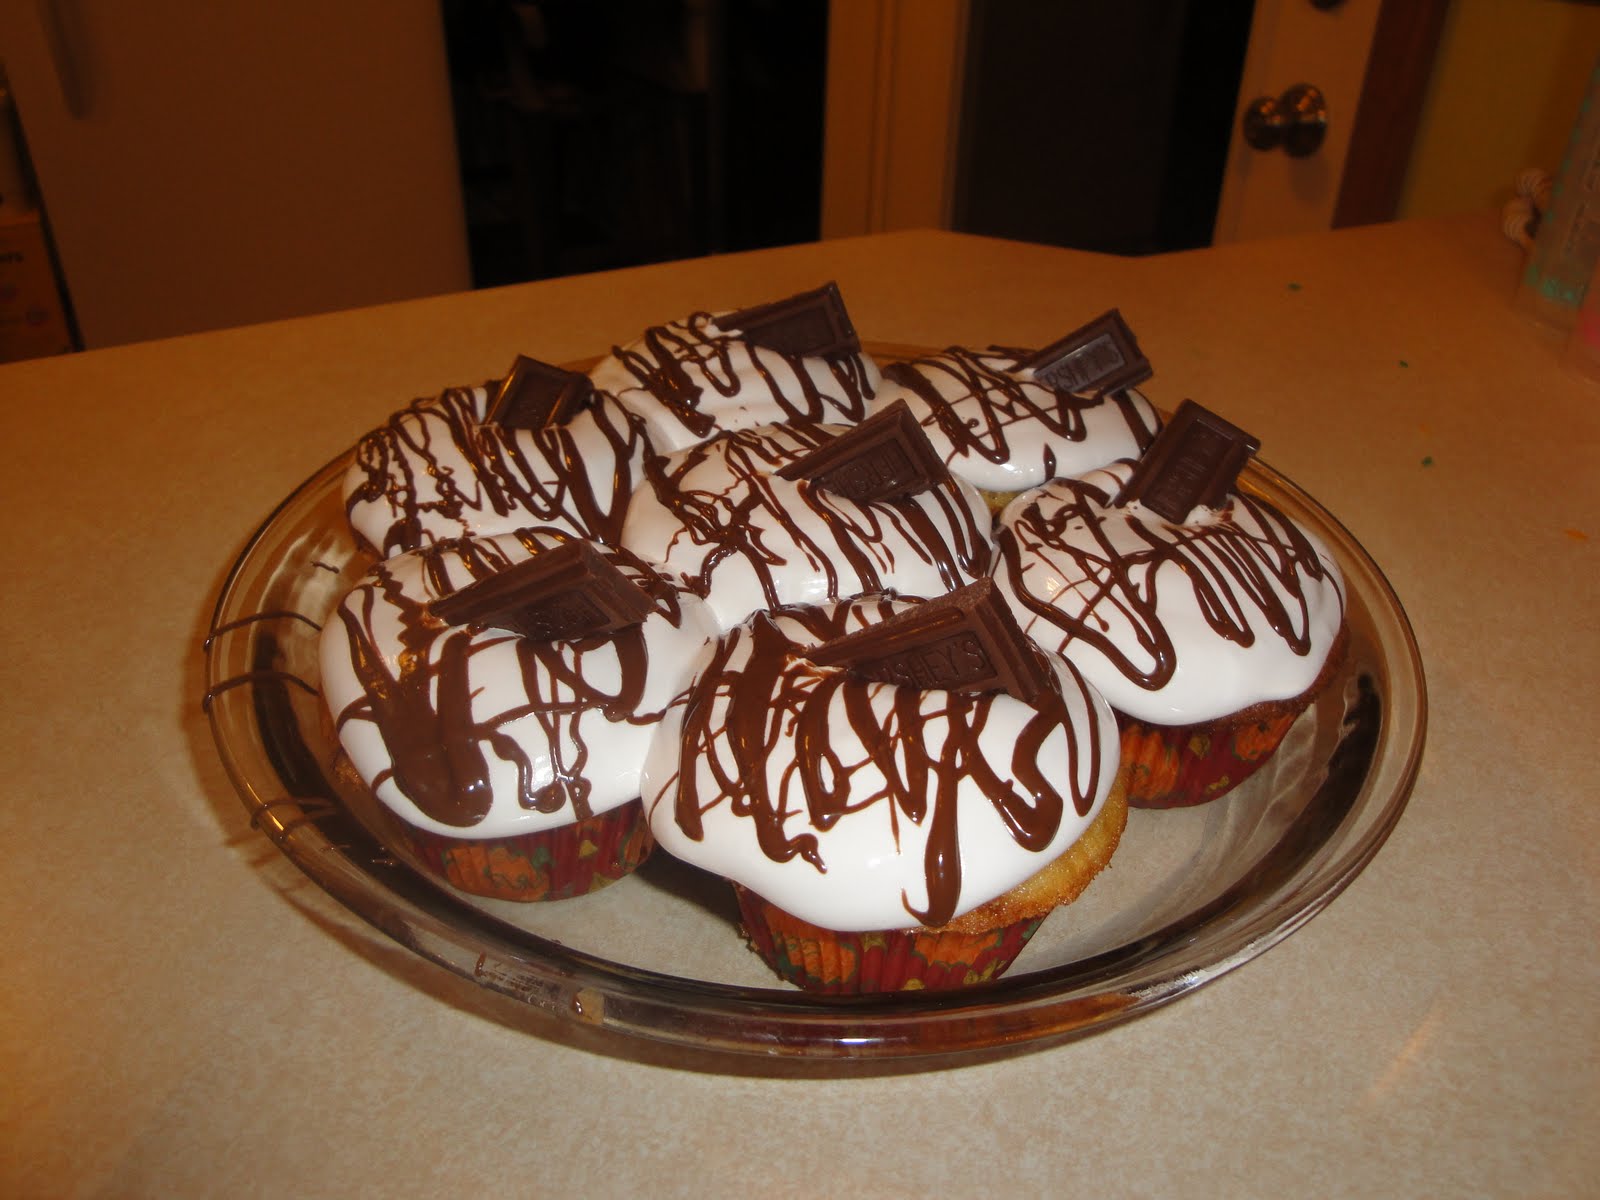
I made s'mores cupcakes today! They consist of graham cracker cupcakes, marshmallow icing, and chocolate drizzle!
here ya go:

graham cracker cupcakes
1 cup of flour
1/2 cup of graham cracker crumbs
1 1/2 teaspoon of baking powder
1/4 teaspoon of salt
1 stick of butter, room temperature
1 cup of sugar
2 eggs
1/2 teaspoon of vanilla extract
1/2 cup of milk

1) If butter is not already room temperature, set it out. Preheat oven to 400 degrees. Spray your cupcake pan with non-stick spray. Line with papers if you want to use them. (Cupcakes do not rise well, just enough to go over the paper and stick to the pan, so make sure to spray it. If you forget, you can use the back of a spoon to un-stick the cupcakes.)
2) Put 3 full graham crackers in to a plastic bag and smash until crumbs are as small as possible (check in measuring cup, but this should equal about 1/2 cup)
3) Combine flour, graham cracker crumbs, baking powder, and salt in the mixing bowl. Stir until mixed well.
4) Gradually beat in butter.
5) Beat in sugar thoroughly.
6) Beat in eggs, sugar, and milk one at a time.
7) Add vanilla and mix until just combined.
8) Bake for about 15-17 minutes. Let cool before frosting.

marshmallow icing

4 large egg whites
1 cup of sugar
1/4 teaspoon of cream of tartar
1 teaspoon of vanilla extract

This is what you're supposed to do:
1) Place all ingredients except vanilla into a metal heatproof bowl from the mixer. Place bowl over a saucepan of simmering water and whisk until sugar is dissolved, about 3-4 minutes.
2) Remove bowl from heat and attach to mixer. Using whisk attachment, whisk for 5-7 minutes, gradually moving from low-high, until peaks form. Add vanilla and whisk until just combined.
3) Use immediately.

and this is what I did (and why my icing looks deliciously melty and tastes very marshmallowy)
1) Place all ingredients except vanilla into a glass bowl over a saucepan of simmering water and whisk until sugar is well blended (about 5 minutes).
2) Pour sugar/egg/etc. combination in to the mixer bowl. Using the flat attachment, mix for 13 minutes, gradually moving from low-high. Get annoyed that it isn't peaking and get out the hand mixer with the whisk attachments and mix for about 4 minutes. Glare at the lack of peaks. Add vanilla, taste test, and decide to use anyway.
3) Use immediately.

then...
Break a full Hersey bar into pieces and microwave in a small microwave safe bowl for 30 seconds. Stir, and drizzle on to cupcakes. (Use 1 1/2 bars for 30 seconds if you want more chocolate). Break apart another full Hersey bar and place pieces onto cupcake top.
Enjoy!

Let me know what you think! Which icing recipe did you go with? Which did you prefer? Have you tried another recipe for s'mores cupcakes?

(I combined 2 recipes for this. The original cupcake recipe can be found here and the original icing recipe came from my grandmother.)

Colored rice!

We made colored rice today. It took very little time and Calandra had a lot of fun with it! She played with it for 45 minutes and only stopped because it was dinner time. I just gave her a cup, a scoop from baby formula, and 2 airplane spoons from her kitchen set. It was nice quiet time, and she had a lot of fun filling things up and making "mountains."
There you go, easy peasy!

TOH Kids Coloring Cookbook!


Calandra loves to help me cook, and she loves to color. Now, thanks to Taste of Home, she can enjoy both! My grandmother sent me the link to this. You print out a page to the cookbook and the kids can color it. Each month they will post a new page for the cookbook, so make sure to check back!
For the site and to download the cover page (for the month of November) and other pages later, go here.

Saturday, November 5, 2011

Say "good-bye" to Goo-Gone and "hello" to homemade DQ Blizzards!

Due to my surgery yesterday, I've been slacking on blog updates- so sorry! I did do some activities and find out a couple secret tricks that I want to share! Activities will be posted later when I upload the pictures. As for the tricks-

Instead of goo gone, you can use peanut butter! Just put peanut butter on the jar (or whatever you are trying to get the glue off of) and let it sit. I let mine sit for about 15-20 minutes while I did the rest of the dishes. I don't know if it made a difference, though, because I've only tried it the once.
Now, it doesn't make it so you can just rinse off the peanut butter and the glue rinses off as well. But it does come off while washing the jar with the same amount of effort of washing other dishes, instead of scrubbing and scrubbing at the glue only for it to never come off and leave the sponge sticky!
(I found this trick in a recent issue of All You)

An even better trick I found is a MUST SEE for ALL cake decorators! If you're like me, you LOVE decorating cupcakes, but you HATE cleaning out the dang decorating bags! Here's a really awesome trick that I have fallen in love with!

Oh and one more. The best recipe so far:

Home made Blizzards!

Are you ready for it?? I hope you're all as excited as I am!

Simply mix 1/4 cup of milk with 2 1/2 cups of vanilla ice cream. My new hero, Todd Wilbur (if you're a foodie, he is also your new hero. Check him out) used a blender, but I used a Kitchen Aid mixer and it worked fine!
Add the extras to make it whatever- I made Kit Kat for my first one! This makes roughly 16 ounces. Anyway- mix it, add extra, mix some more, and pour it in to a glass. Time for the test. Hold the cup upside down! I know, it's scary, because you don't want this mass of deliciousness to fall to the floor and not be able to eat it... but do it! It should stay in the cup! As long as it does, you've done it perfectly. Apparently, it is corporate policy that before the employees at DQ give you your Blizzard, they are supposed to flip it upside down in order to ensure its quality. So do it to yours!

Hopefully this recipe and these 2 tricks will hold you over for now until I quit slacking and upload the pictures from all of our activities we've been doing. Enjoy!

Monday, October 24, 2011

Decorating the house


Kids LOVE to help decorate. They didn't quite help us this year so much as run around in the fake spider webbing and pull it apart. Which is helping, I guess, since it needed to be pulled apart anyway! This picture cracks me up because Calandra and Tristian had just spent the last 10 minutes or so pulling up the solar lights and swinging them around, all while the spider webbing was stuck to a sequin in Calandra's sparkly shoes. Oh, and she's also telling Tristian about dressing up!
So go ahead and give them something to put up around the house. Kids love to find special places around the house to stick something to the wall, hang something up, and especially hanging window clings/gels!

Pigeon Roost


One great thing to do any time of year (well, maybe not winter) is to visit a nearby farm! Luckily for us, there is a place called Pigeon Roost about a half hour away. It is a lot of fun, and they combine animals and amusement! You can get pumpkins (and gourds/squashes/corn/cider/random decorations/costumes/and apparently cats last weekend) I found it last year and vowed that it would be a family tradition!
I also took my girl scouts this year- they had a blast as well! It really is great for all ages. We fed some animals, went on a hay ride, got lost in a maze, played on all of the stuff, ate some fresh kettle corn, and picked out pumpkins!

Coming soon...

Will be posts about...
pumpkin bowling!
make your own crinkle/tag baby toy!
carving pumpkins!
trick or treat!

Potato Painting


For potato painting, just cut a potato in half, carve a design of some sort in to it, and give it to your child with some paper and paint! I used orange paper and dark plum paint.
Here's a horrible picture of the pumpkin I carved into the potato for Calandra to use... Not the greatest, but she didn't care!
I do not have a picture of the finished project because it is hanging on my mother in law's refrigerator and I forgot to take a picture of it before we left! For shame... but I will next time we are there and post it for all of you lovely people!

Ghost Feet

OOOoooooOOOO!
(that's a ghost sound)

We made ghost feet today! By we I mean my sister in law and I made ghost feet of her son, my daughters, and our niece. It's easy and adorable!

To start, gather white paint, a paintbrush, black paper (dark purple would probably look nice too) a plate for the paint, and accessories like a black or silver sharpie and/or googly eyes!Paint the child's feet and stamp them down on the paper with minimal wiggling. Wash the feet unless you want little white footprints all over the house!

Let the prints dry. Flip them over and glue on googly eyes or draw them on with a black sharpie. You can write the kid's name and the year on with the silver sharpie, too!


I haven't finished the ghost yet because I lost my googly eyes in the move :( And my silver sharpie. I will post a picture as soon as they're done! But here are the adorable footprints of a 9, 2, 1 year olds and a 2 month old!

Pumpkin Show!


So much has gone on in the past week that it's been hard to keep up with the posting! Here's an attempt, though!
Well, Saturday we went to the Circleville Pumpkin Show- if you live in Ohio and haven't been, go! It's better than any fair. It's huge but not crowded because it is spread out on the streets of downtown Circleville. There's pumpkin everything- ice cream (I had a milkshake this year, delicious), doughnuts, funnel cakes (which we actually couldn't find this year) and of course pie, among other foods. This picture is of Calandra on a ride that she LOVED and went on multiple times! Yeah, I kind of cheated with Saturday's activity, but it was a lot of fun :)

Tuesday, October 18, 2011

Homemade Sidewalk Paint

Today we decided to have lunch on the back porch and have some fun with chalk (for Tristian) and some sidewalk chalk paint (for Calandra). Our lunch consisted of bologna sandwiches, scrambled eggs, salad, chips, and juice. Tristian was less than impressed with anything other than the ketchup and mustard on the sandwich. Carleigh and Miranda decided to take some time dedicate to their favorite activity... sleeping.

An adult will probably be less then impressed with the paint (as I was at first) because as an adult, we feel the need to get rid of the excess paint on brushes... but as a child, you don't have that need. So the paint works great for kids, because it needs to have a decent amount to work well. It is edible, which is good for very young children (like 1 year old Tristian), although I wouldn't recommend it because it can't taste very good. It can't be that bad, though, because both kids licked the cup/paint brush more than once. I don't know how washable it is because neither of them got it on them too badly or on their clothes, but I would imagine that it's just as washable as cornstarch usually is.

Here's the recipe:
Mix equal amounts of cornstarch and water. Stir, and add food coloring. Add it 1 drop at a time-I only put in 2 drops and it made a nice color. Don't make it until you need it, and don't make a lot thinking you can store it and use it later... because I don't know how well that works. If you do decide to make a lot to store some, let me know how it works! I made this batch when I made lunch and took it outside with us to be played with after lunch. It settled pretty quickly, during which the cornstarch STUCK to the bottom... I stirred it and it was fine, but like I said, I don't know how well it would work long-term.

Like I said, you have to put a decent amount on the sidewalk (or porch, in our case) to get it to show up, but adults are the ones who have a problem with this, not kids. And once it dries, it really pops! Here's a picture of it half-dry. All in all, it was an easy project that Calandra had fun with, and I'll probably make it again.

btw, I originally got the recipe here but tweeked it.

Monday, October 17, 2011

Lazy Day


Every day doesn't have to be a big to-do. Today for our activity, we picked a lazy one, and our day (lazily) went something like this...
Nate, my sister-in-law Miranda, and I woke up. The kids all woke up and we ran around like crazy trying to get all of us ready. Nate went to school, and Miranda and I went to the grocery store to get stuff for a picnic for all of us. We finally made it to the park just before Nate got out of class, and he met us as we were finishing our picnic and heading for the playground. The kids ran around while we took pictures. They swung (Tristian LOVED it, and Callie just asked if we would "push her like a baby" haha) Then Callie wanted to climb up on a giant climbing rock that she has been dying to climb since she first came to the park a couple years ago (ok, maybe she wasn't eyeballing it as an infant, but pretty soon thereafter). We played on the merry-go-round for a little while until Tristian got nauseous, then decided to head home so he could take a nap. All in all, it was a good day and we had a lot of fun and took a lot of really cute pictures (which is good, especially for Miranda, because Tristian won't sit long enough to get actual pictures done for his first birthday, but we got some adorable ones here that are better than any posed-studio pictures would have been!


Yesterday, the girls and I went up to visit Callie's best friend Sydney, and I will post details and pictures of our super-fun visit when Syd's mom emails them to me :)

Thursday, October 13, 2011

Homemade Fingerpaints

Just so life doesn't get ahead of us, I like to try to do a project a day. I didn't do anything fun with Calandra the last 3 months of my pregnancy, and I regret it. I was at home the whole time and even though we enjoyed being lazy, watching tv, playing outside, and taking naps... I have little memory of the 3 months, and the fact that I let that long go without making memories for her disturbs me a little bit...
So because everything homemade is better (well, a lot of stuff, anyway), here is a recipe for washable, edible, and homemade finger paints that I myself have used twice in the past month!

In one large saucepan, stir 1 cup of flour and 1 cup of cold water until smooth. Add 3 cups of cold water and heat over medium heat, stirring constantly until thick (takes about 10 minutes). Reduce heat by half and stir for 1 minute. Separate into containers (I used Gladware, and this made enough for 4- 1 cup containers). Color with food coloring. Cover with plastic wrap and let cool.

Make sure you only cover it with plastic wrap... I made the mistake of putting actual lids on it, which did not allow the gas made by the flour/water to escape. It turned the paints into a disgusting, foul smelling, watery mess. Oh, and I had the 4 containers stacked on top of one another, so when the bottom one burst open, the top one fell against the wall and dripped down it until I got home and noticed.

I have a lot of other recipes for homemade paints and whatnot, but I don't want to post them until I can try them out and am willing to stand behind them!

Apple Painting


I couldn't find my camera, so I had to use my phone... and this is the best picture I got, lol.

We did our apple painting! Calandra had a lot of fun- she had one round apple and one I cut up to be star shaped. I cut the round one sideways so it would have the star in the middle, but she was having fun smearing the apples around and messed up the one that I managed to get to show up, lol, but that's alright. Then she painted on herself. And the pad of construction paper. But not the carpet!

Originally, I was going to put little faces on her little round apple stampings, but she had too much fun smearing everything :)

I am getting ready to start her pre-k lessons at home, and this is something I will definitely have to re-visit for A.

Baking Blueberry Muffins!

We LOVE to bake. It's another of our hobbies. And by "we" I mean my grandma, myself, and my daughter. My mother does not. Oh well.
Not too long ago we made blueberry muffins- here are some pictures I snapped while Calandra did all the work had all the fun.


Calandra had a lot of fun mixing everything together in the bowl with her "wiss" (wisk) and flinging it around making a nice little mess with muffin batter everywhere... When she was done mixing it all, she jumped down off of her chair and ran into the bedroom yelling, "DADDY, I MAKE MUFFINS!!!"


Just a day at the park... (scrapbook memories)

I have a lot of hobbies- one of which is scrapbooking! I like doing it because it's fun, and Calandra LOVES checking out her scrapbooks way more than she likes looking at plain-old photo albums. Here is a page I am particularly proud of because it was super easy and is super cute! The pictures were taken with my phone, so they aren't very good quality, sorry!

First, I got out the paper I wanted. I picked a textured green for the leaves & grass, a rich brown for the trunk, and a nice blue for the sky/background. I cut the pieces out using an exact-o knife, placed them where I wanted them, and glued.I wanted to make a swing, so I glued 2 pieces of brown yarn underneath the tree branch and put a candle on top to weigh it down...
Then I took the brown piece that I cut out for the seat and put the yarn through little notches in it and glued it down as well. (Gluesticks are NOT my adhesive of choice for scrapbooking... but it's all I had in this case)


Then I added the lettering and the pictures! The "Fun" and "Park" are foam sticker-letters from the Easter set I got a couple years ago. The "at the" is just sharpie. There's my daughter looking at pictures from a year ago and pointing at her daddy (oh and my fat pregnancy calf) Do you have any pages you are particularly proud of? Post a picture-I would LOVE to see it!

Welcome!

In light of various not-so-awesome things that have happened in my life lately, I am officially checking out of crazy-ville and checking back in to my life goal- being the best supermom that I can. I had a nice might-need-a-liver-transplant-at-22-turns-out-it's-just-gallstones scare last week, have postpartum depression, and currently live in my mother's basement while my fiance (who I don't see as much as I would like to) and I (and by that I mean just him because I do not currently have a job) save up money for a house. My toddler has WAY too much energy and I have WAY too little sleep, so it's time to start kicking butt at supermom-ing again and get things back in to a routine. Oh yeah, and letting you laugh watch along the way. So please get some popcorn, sit back, ignore the kids throwing said popcorn around, and join us.

Here goes nothing...